Printer Connection Manager |
Introduction
This software is a MS Windows HTML Application (HTA) that helps users connecting and disconnecting available printers on the local network.
This software will maintain a list of available printers. Main focus is a simple and end user friendly interface, inter alia, by grouping printers into organizational units such as location, print expenses or other criteria for easy access.
Due to the nature of this software, it is mainly aimed at larger companies or educational establishments with many printers, where users do not always have the expertise to go through complicated MS Windows dialogs to search for and connect a specific printer.
Detailed feature description

A - Default printer
This shows the current default printer if there is one.
B - Printer account
If you have a print accounting system such as PyKota and a personalized webpage where users can check their current printer credit, you can link this page here.
C - Overview image
Add an image to be shown at the top of the list. Organizational units will be highlighted on this image if location information is set up for a unit.
D - Default printer
If the listed printer is the default printer, there will be a check mark in front of the name.
E - Connect/Disconnect action
When a printer is already connected, there will be a "disconnect" option, otherwise the "connect" one.
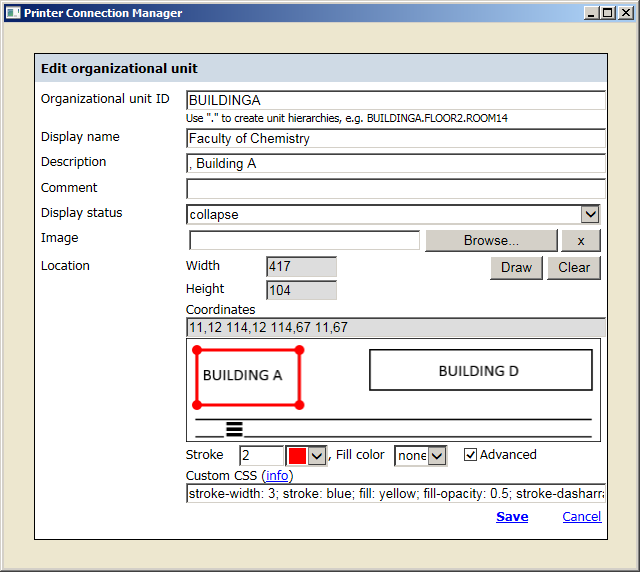
F - Name of organizational unit
This displays the name of the unit, the printers in the example are grouped by rooms, so there is the room name. In case you use another system to order by, chose an adequate name.
G - Description of organizational unit
The unit name should be short and precise, the description allows some additional information. In the example you will see that the room location has been put there.
H - Expand/Collapse organizational unit
This allows to expand and collapse the organizational unit, so that users can hide units which are of no interest to them. Note that you can pre-define which units are automatically expanded/collapsed on application start.
I - Image of organizational unit
The image of the organizational unit is shown above the printer listing. Printers and nested organizational units will be highlighted if location information is set up.
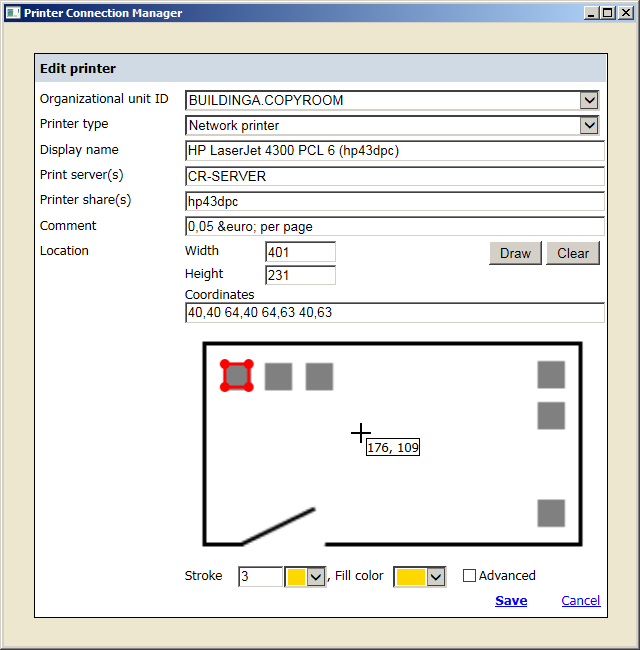
J - Printer display name
You can chose anything you want as display name as they have nothing to do with the internal printer share name. However, the users should be able to uniquely identify a printer within an organizational unit. If you have more than one printer of the same type in the same room it is advisable to also add additional information, e.g. the share name in brackets.
K - Printer comment
Chose anything you want as printer comment. In the given example the print expense and usage restrictions have been put there.
L - Error message
When an (connection) error is encountered, the application will print it inside the comment field, completely replacing the comment visually.
Configuration
Rooms and printers can be configured inside the application. Enter the special configuration mode by clicking the "Configuration" link below the room listing. Use "Save" to finish the configuration. The HTA script file will be modified with your changes. Some changes such as switching the display language may require a restart of the application.
The configuration frontend is still in beta phase. Please save the configuration once in a while during editing, to create backup copies. This way you will be able to simply revert to a working version if need be.
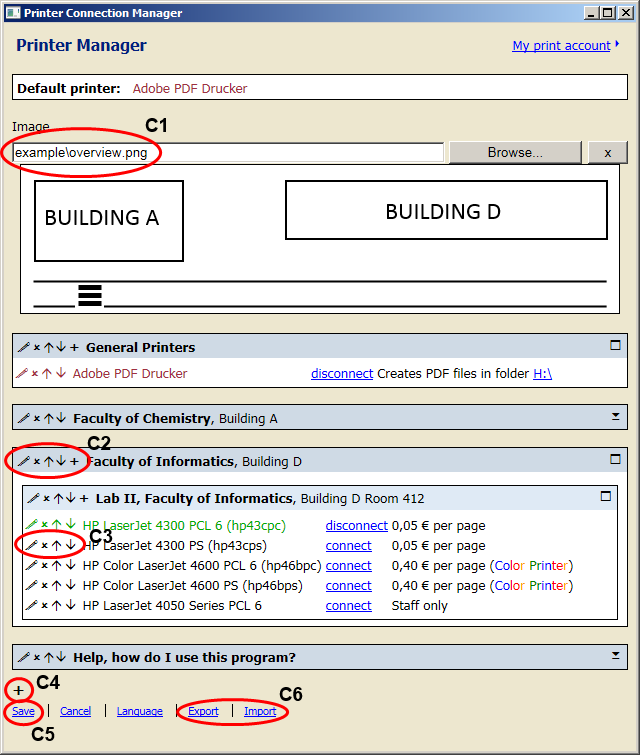
C1 - Select overview image
Select an overview image to be shown at the top. Using an image allows you to set location information for the top level organizational units.
C2 - Modify organizational unit
Edit or delete the organizational unit, move it up or down in the list and add new printers.
C3 - Modify printer
Edit or delete the printer and move it up or down in the list.
C4 - Add organizational unit
Add a new organizational unit to the list.
C5 - Save configuration
Save the configuration to disk. This will first create a backup copy of the currently executed HTA file and then save all changes.
C6 - Export/Import configuration
Exports or imports the current configuration to/from CSV files.
Advanced configuration
More advanced configuration for both the layout and the room/printer data can be done inside the script file. There are comments to each option. To switch language from English to German or vice versa, you can simply comment in the language constants for the language you want, and comment out the others.
Loading room and printer data from CSV files always takes precedence over in-script configurations and changes made through the frontend.